
February 7, 2017
Watch the How-to Instagram Scheduling Tutorial
Opt-in to Receive Push Notifications from Sprout’s Mobile App On Your iOS or Android Device
Sprout’s iOS and Android apps provide the flexibility to configure Inbox push notifications for individual networks, profiles and specific message types. In addition, users can configure workflow push notifications for Tasks, Message Approval and Instagram Scheduling. Before you can configure your personal notification settings, you must opt-in to receive push notifications on your device.
- HOW TO ON iOS:
- Open up Settings on your iOS device.
- Choose Sprout Social > Notifications and then toggle Allow Notifications.
- HOW TO ON ANDROID:
- Open up Settings on your Android device
- Choose Notifications > Sprout Social and re-enable Notifications from this screen.
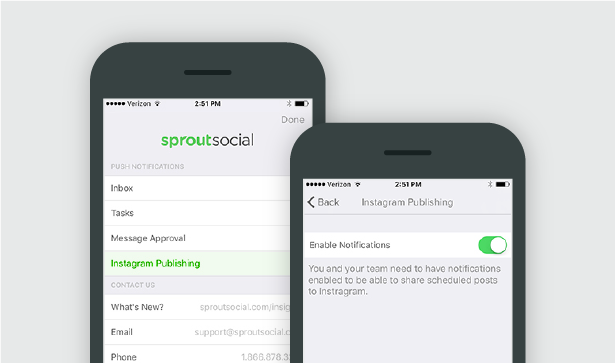
Turn On Push Notifications for Instagram
Instagram push notifications must be turned on to follow Sprout’s Instagram Scheduling workflow.
- HOW TO
- Ensure that your Instagram profile is connected to Sprout.
- Open the Sprout Social mobile app (iOS or Android).
- Tap Settings.
- Under Push Notifications tap Instagram Publishing to enable notifications.
- Repeat these steps for each team member’s phone and/or Instagram account that plans to receive Instagram Scheduling notifications.
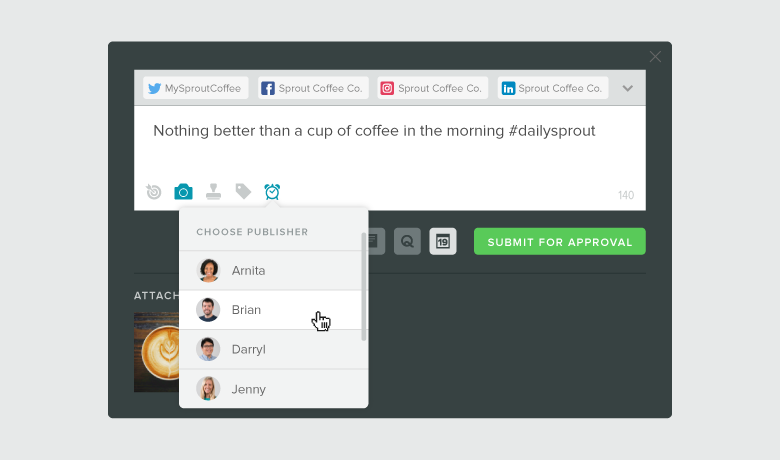
Schedule An Instagram Post
After you have connected your Instagram profile to Sprout, downloaded the Sprout Social mobile app and turned on push notifications, you’re ready to schedule Instagram posts.
- HOW TO
- Open Compose and select an Instagram profile from the profile picker.
- Create your post that includes a caption and image.
- Select the Instagram icon and choose your Publisher. Any user with publishing permissions and Instagram push notifications enabled will appear in this list.
- Send the push notification immediately or choose to schedule, queue, draft or submit the message for approval (Professional and Advanced plans only).
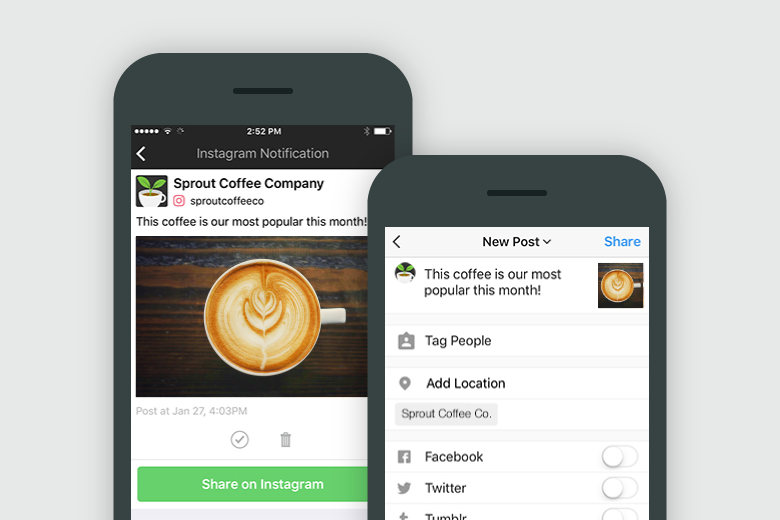
Post to Instagram from Sprout’s Push Notification
Once the designated publisher receives the scheduled push notification, they must complete these steps before the photo is posted.
- HOW TO
- Open the Sprout Social push notification from your phone’s home screen or notifications feed.
- Select Share on Instagram to open the photo in Instagram.
- Paste your caption (automatically copied to your clipboard from the push notification).
- (Optional) Tag profiles in the image and/or add a location.
- Select Share.
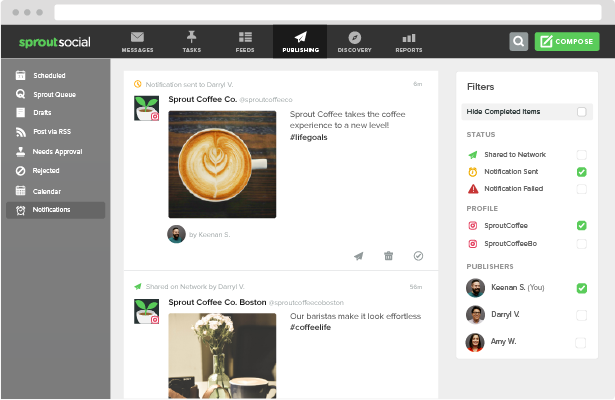
Monitor Your Publishing Notifications Feed
Sprout now includes a Publishing Notifications feed. This feed displays the status of push notifications to indicate if they have been sent to a designated publisher or if posts have been opened in their native network. You can also resend, delete or mark these notifications as complete.
- HOW TO
- Go to the Publishing tab (or the Notifications screen in the Sprout mobile app).
- Select Publishing Notifications from the left navigation.
- Click the icons on the status to resend the push notification, delete it or mark it as complete.
Share