How to create a YouTube channel for your brand in 5 steps

Written by Carly Hill
Published on February 15, 2023
Reading time 7 minutes
Table of Contents
YouTube may not be a new player in the social media game. But it’s tried and true. With the importance and popularity of video only growing on social media, developing a YouTube marketing strategy is worth your while–and then some.
Part discovery machine, part social platform, YouTube touts over 2.58 billion monthly active users. And as the world’s second-largest search engine, it’s a key platform to use to connect with new audiences, grow brand awareness and more.
If you’ve been wondering how to start a YouTube channel but haven’t jumped in yet, this is your sign to get started. Use this step-by-step guide so you can get started in minutes.
How to create a YouTube channel in 5 steps
Whether you need the 101-level breakdown, or just a refresher, feel free to go straight to whichever section you need most.
With that, here’s all you need to learn how to make a YouTube channel:
- Sign into Google
- Create a new YouTube channel
- Customize your channel’s layout
- Customize your channel’s branding
- Customize your channel’s basic info
- How to make a YouTube channel that’s discoverable
1. Sign into a Google account
Before you start a YouTube channel, you need to sign into Google.
If you have a Google account that you already want to use for your channel, you’ll be prompted to sign in.
I recommend creating a new, dedicated account specifically for your YouTube channel. This way, you can share it with multiple people. This also limits any security issues tied to your personal account.
Once you create a Google account, head to YouTube and click Sign in.

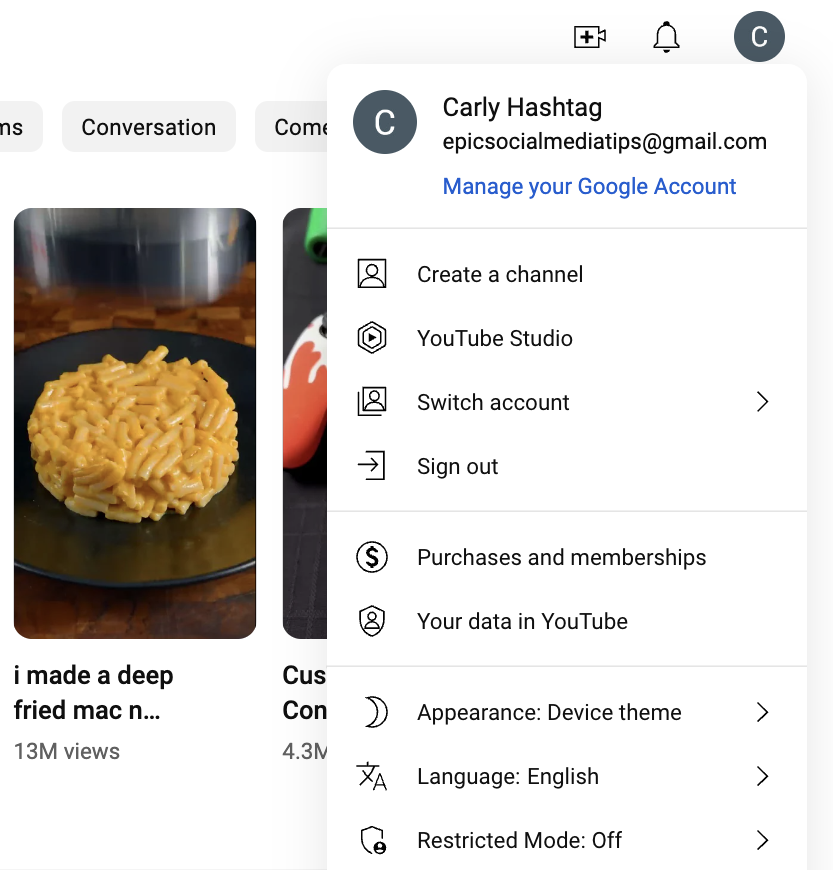
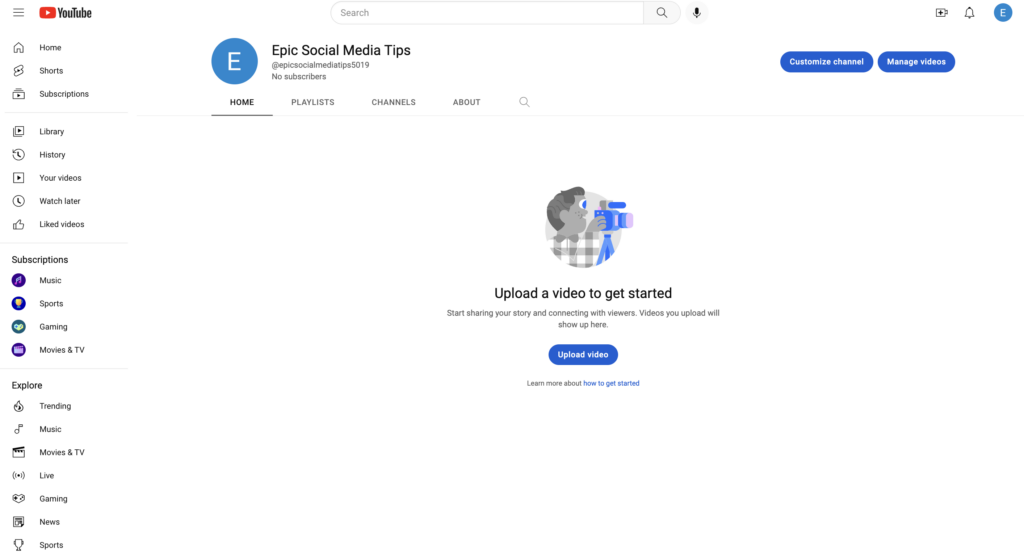
2. Create a new YouTube channel
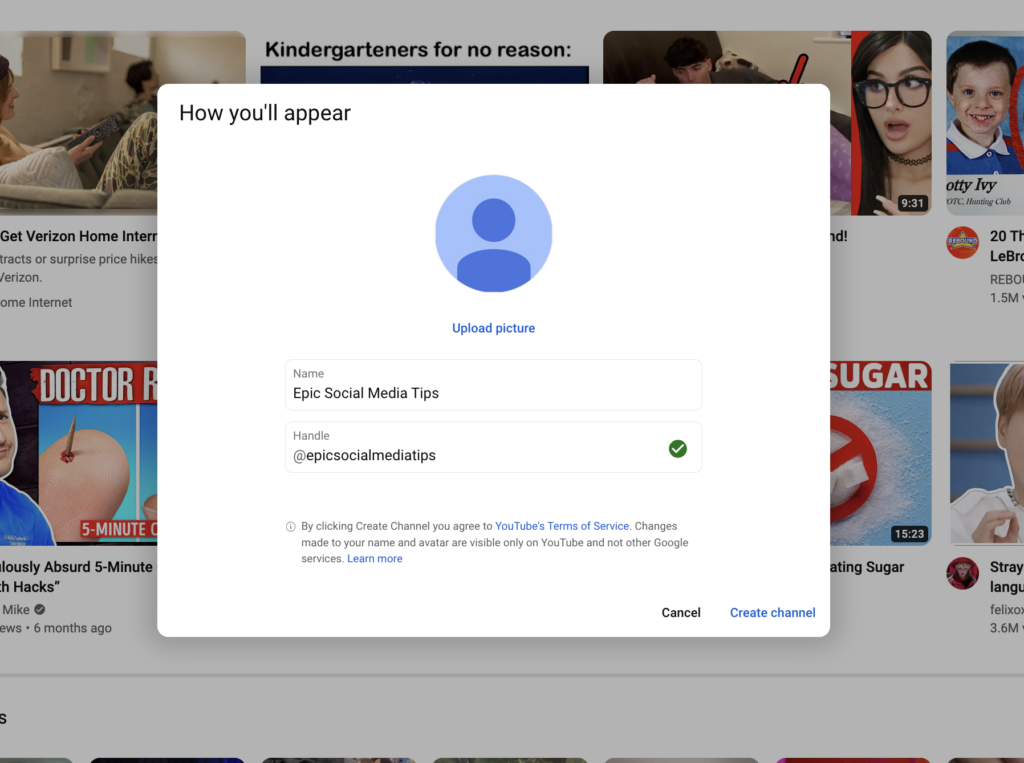
Head over to YouTube’s homepage. Click on the avatar icon in the top right corner of the screen. Then, select Create a channel from the drop-down.
You’ll then be prompted by the following screen, which asks you to create a channel name.
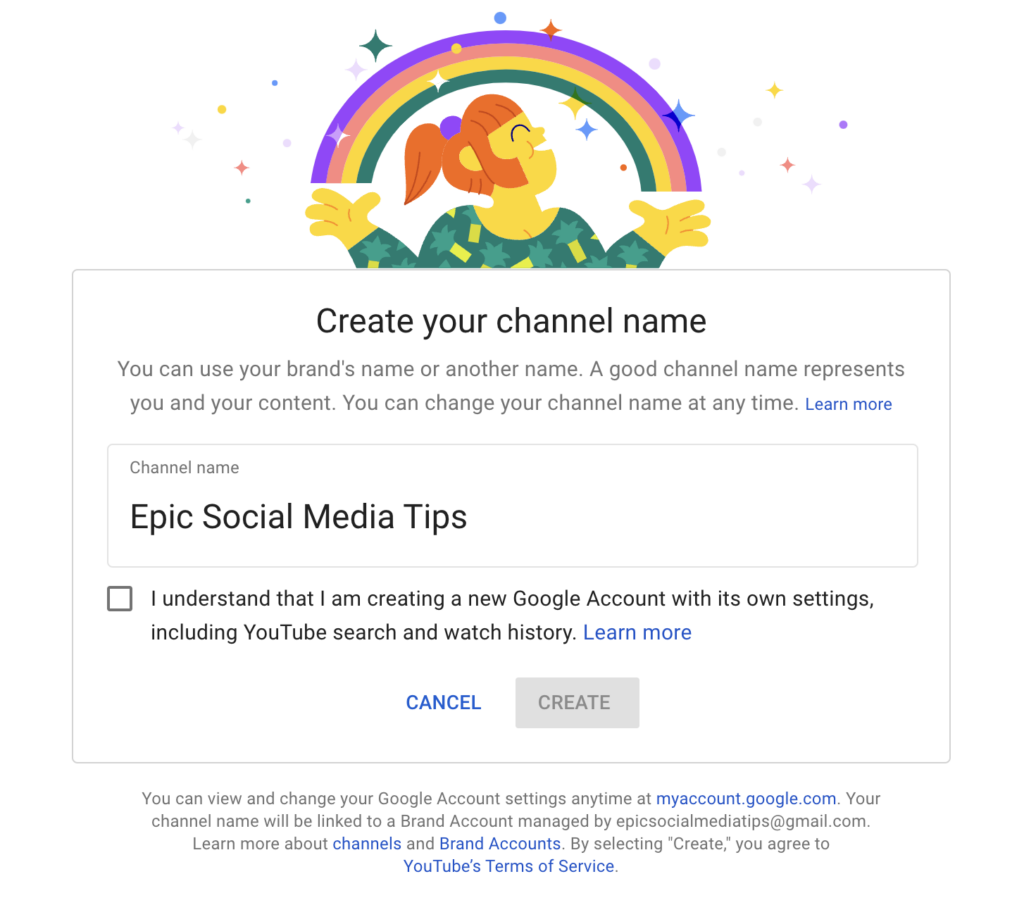
Now, you can stop here. Or, you can create two channels: one for your Google account and a separate one for your brand. To do this, go to your Settings > Create a new channel > you’ll be prompted by this window.
Unless you’re a creator, dedicating your YouTube channel to a brand account makes the most sense and allows you to add multiple managers.
Pro tip: Make your account extra secure by setting up two-step verification. Head to your Google Account > click Security in the navigation panel > click 2-Step Verification > click Get Started under the “Signing in to Google” section and follow the steps.
Voila—your account is created, and secure! Now, you’re ready for the fun part.
3. Customize your channel’s layout
To get started, click the “customize my channel” button at the top of the screen.
From here, you’ll be taken to the YouTube studio where you’ll see options for customizing your channel, including Layout, Branding and Basic Info.
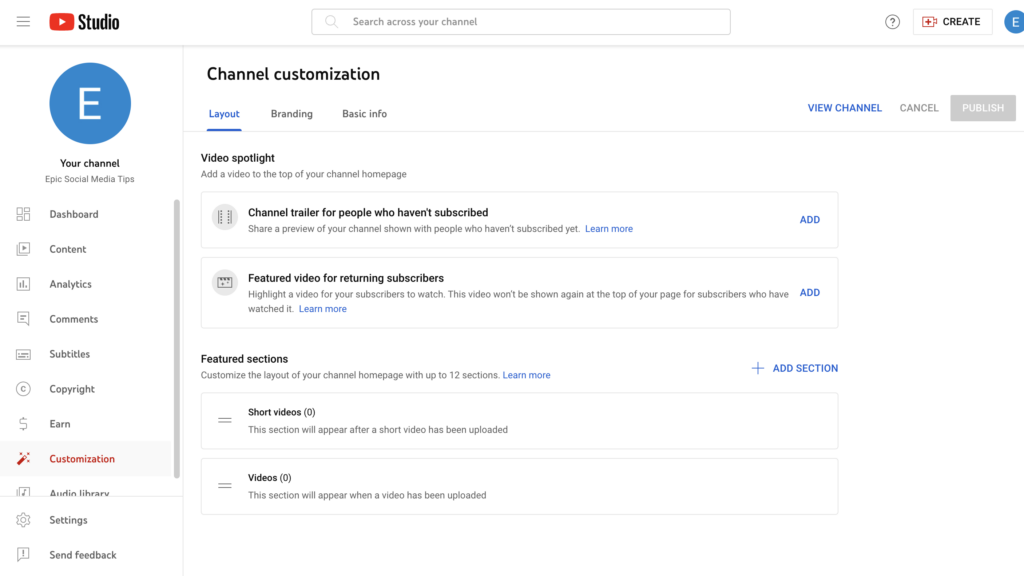
Let’s start simple with your Layout. This enables you to organize what content people see first. Let’s go through each of these elements:
Video spotlights
This is the first piece of content that appears on your channel. There are two types you can add. A channel trailer plays for people who haven’t subscribed to your channel.

A featured video plays for your subscribers, but only for those who haven’t seen it yet.

Featured sections
Choose up to 12 featured sections that will appear on your channel. These organize the content your visitors see first.
This defaults to a Short videos section and a Videos section. But click the + ADD SECTION button to choose from more.
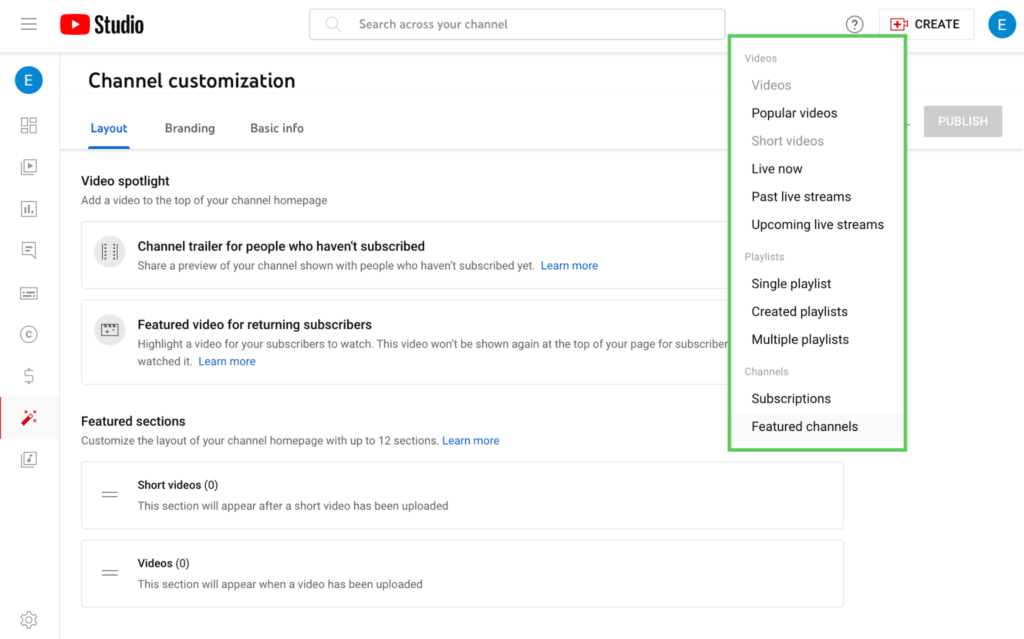
The playlists and sections you choose will depend on how you use your channel. If you go Live often, the “Live Now,” “Past Livestreams” and “Upcoming Livestreams” sections would be winners.
For example, Monterey Bay Aquarium features a playlist full of relaxing livestreams that their channel is known for.

Once you’ve customized your layout, hit the Publish button in the upper right. Or, continue on to the next step: Branding.
Pro tip: If you don’t plan on uploading frequently, choosing the Feature channels section can make your channel look more active. This also positions you as an industry leader, and shows fellow YouTube creators some love.
4. Customize your channel’s branding
There are three areas you can adjust your channel’s branding:
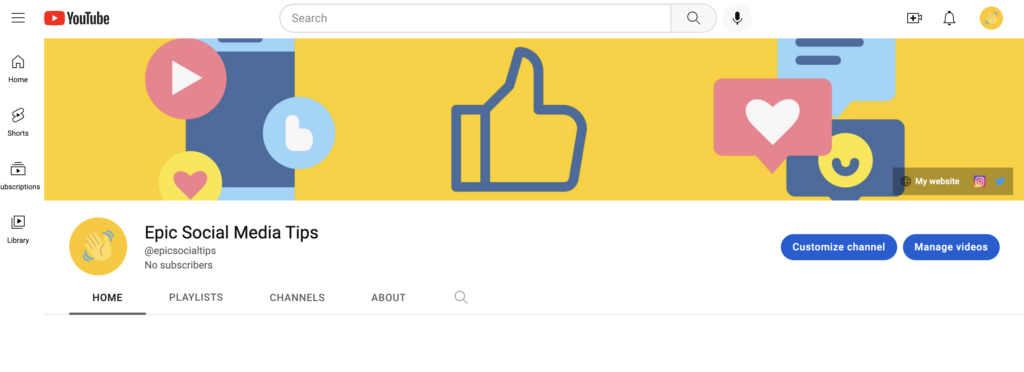
- Picture (aka profile pic) appears on your channel, next to your videos and on comments you write.
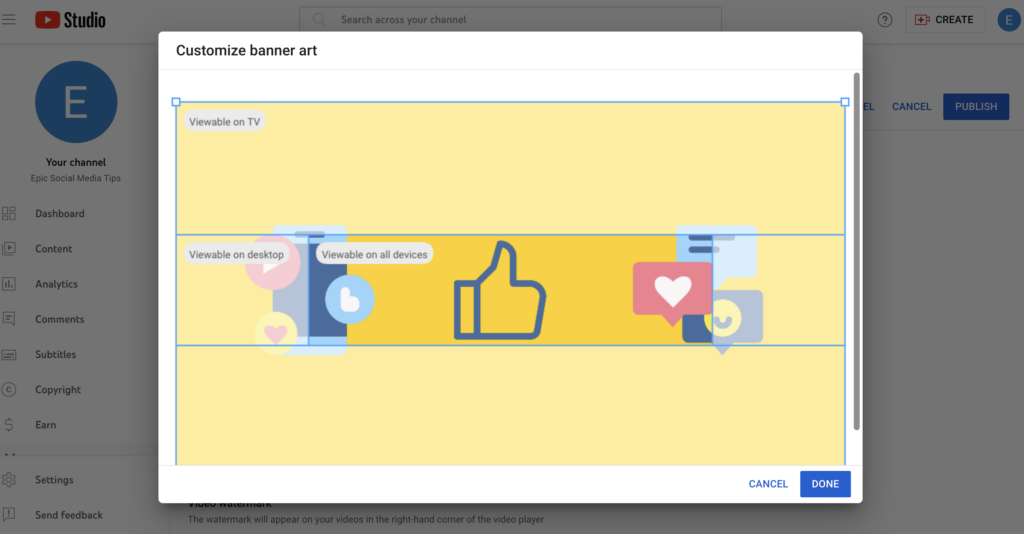
- Banner image is the large graphic at the top of your YouTube channel.
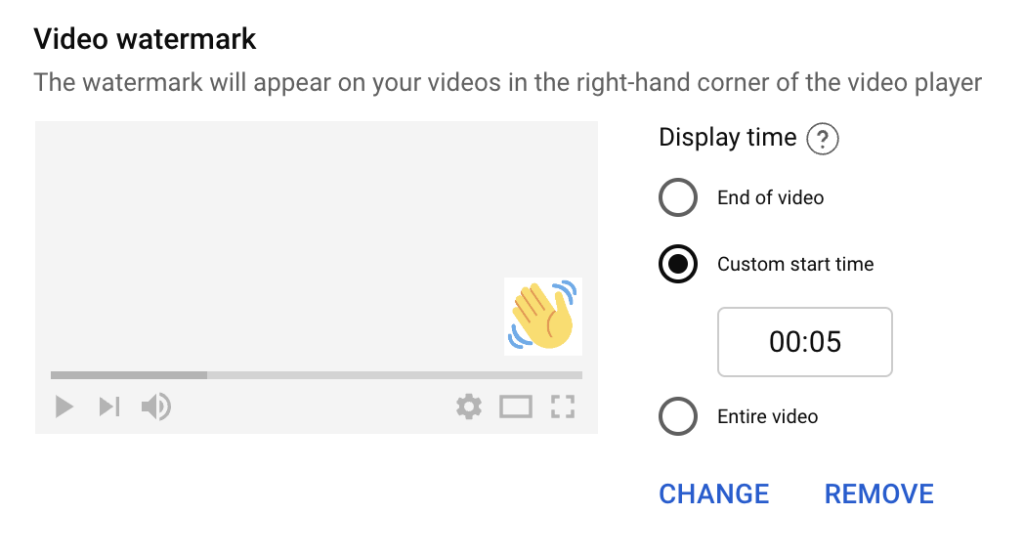
- Video watermark appears in the bottom right corner of your videos. You can choose when and for how long it appears.
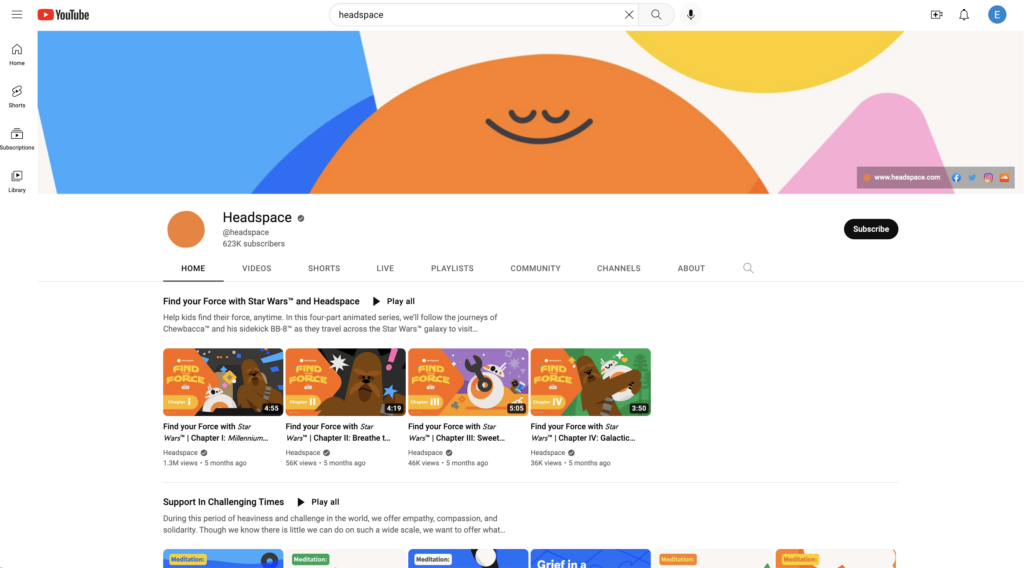
These visual elements should match your branding. For example, notice how Headspace’s visual elements all share cohesive designs, colors and shapes.
Resources like Canva will help you craft correctly-sized images in a matter of minutes with templates tailor-made for YouTube. Before you create images, confirm the dimensions for YouTube images:
- Profile picture: 800 x 800 px
- Channel banner: At least 2048 x 1152 px, but the safe area for mobile and web without cropping is 1546 x 423 px
YouTube will show you a preview so you can see if anything is getting cropped out on various views.
There’s no one right way to approach YouTube images—just pick visuals that reflect your brand.
5. Customize your channel’s basic info
Customizing this info will help you make a stronger impression with your channel. It’s also your ticket to funneling channel visitors to your website, other social profiles and more.
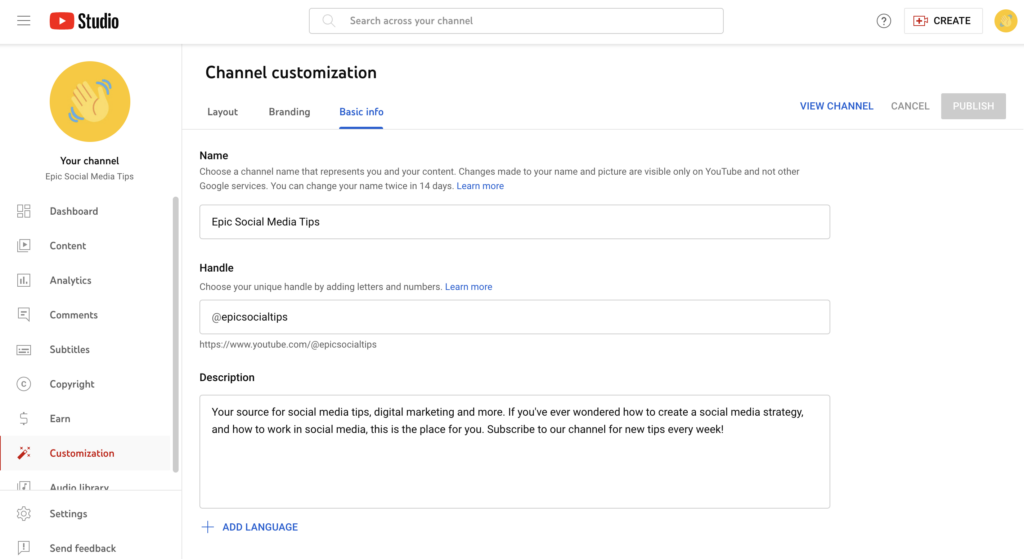
Let’s go through each piece of basic channel information you can adjust:
- Name: This should represent your channel, brand or you.
- Handle: A short and simple, yet memorable and searchable version of your name. This will also appear in your public URL.
- Description: With up to 1,000 characters, add a little personality to your channel description. You can also add versions of your description in multiple languages. Include popular search keywords relevant to your channel and content.
- Channel URL: Your channel’s web address as it displays with your user ID.
- Links: Include links to funnel visitors to your website and social channels.
- Links on banner: Choose up to five links to appear in the lower right corner of your banner. Just be careful that these links aren’t covering important information or text in your cover image graphic.
- Contact info: Include a public-facing email where people can contact you for business or press inquiries.
Once you hit publish, congratulations—your channel is officially set up, and you’re ready to add videos.
How to make your YouTube channel discoverable
Now that you know how to create a YouTube channel, it’s time to make yourself discoverable. This is an ongoing process of optimizing your channel and content.
Let’s get into some tips to attract new viewers and traffic to your channel. And if you want to dive deeper, check out these resources once you’ve finished this article:
- YouTube SEO
- YouTube hashtags
- 16 ways to promote your YouTube channel for more views
- YouTube analytics
- YouTube descriptions
Post videos regularly
An active channel means more chances to keep your audience engaged and growing.
If you’re not ready to create new videos for YouTube, start with what you have. For example, when I managed social for Shedd Aquarium, we repurposed a video from a viral Tweet on YouTube, where it also racked up impressive views.

Then, we built an entire playlist based on the successful, viral videos.

Start building your library with videos that have performed well on other channels. Successful Reels and TikTok videos, for example, can be uploaded as YouTube Shorts.
Optimize your videos
Remember: YouTube is the world’s second-largest search engine.
Keywords really are key when it comes to YouTube discoverability. Use them in your video titles, descriptions and chapter titles. Explore common search terms with YouTube’s built-in keyword and search tool. Find it in YouTube Studio > Analytics > Research to explore.

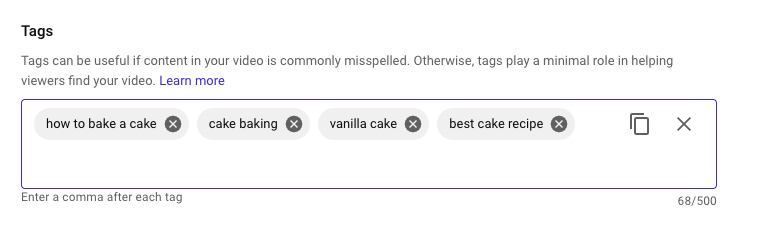
Also use the right tags. YouTube tags—not to be confused with YouTube hashtags—help YouTube’s algorithm determine what your video is about, and therefore how to rank it in search and who to show it to.
Create eye-catching thumbnails
Video thumbnails create interest and help you stand out in search results—90% of the best-performing videos have custom thumbnails.
Using bold thumbnails that include text (Think: your videos’ titles or themes) and feature a person all help grab attention. Unbounce uses all of these tricks, plus indicates which videos are in a different language.

Use playlists to categorize your videos
Playlists organize your content and make it easier for visitors to find the content that interests them and binge it—just remember to update them.
This also helps you extend the life of older videos by pairing them with more updated content.
If you’re not sure how to do this, check out our article on how to make a YouTube playlist.

Cross-promote your YouTube content on other channels
You have an existing audience on your other channels. Share your YouTube content across your social channels, and on channels outside of social—like on your website, blog and in email newsletters.
Doing so helps drive your existing audience to your budding YouTube channel.
Keep an eye on your analytics
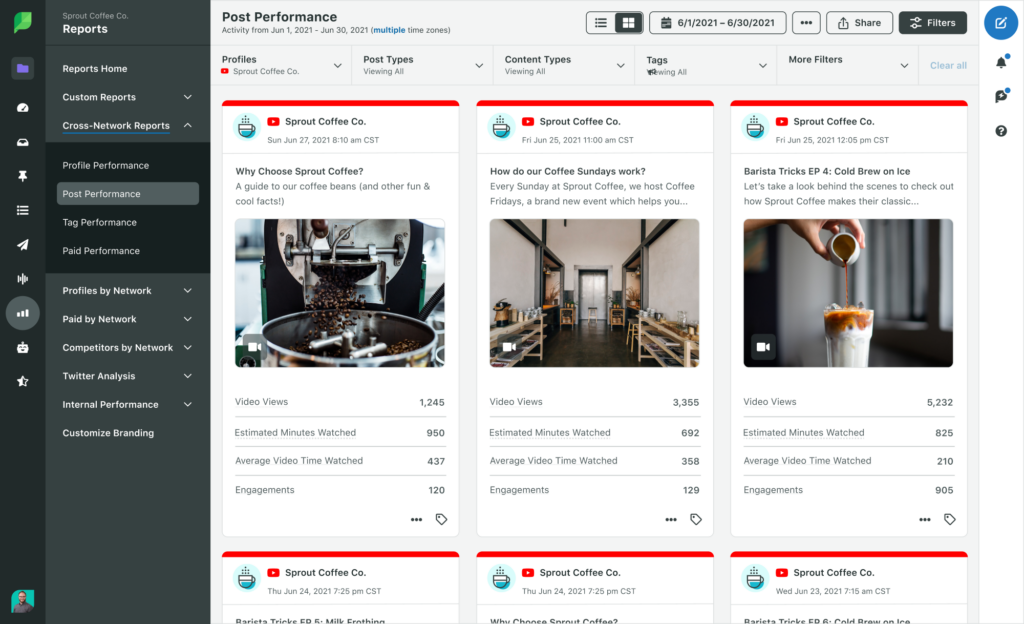
From average view duration to followers gained, YouTube analytics give you a deeper understanding of what videos work, and which fall flat.
The analytics tab in YouTube Studio is a goldmine of analytics. But a tool, like Sprout Social’s YouTube Report, provides a more customized look at how your content performs.
Put your knowledge of how to create a YouTube channel to the test
Learning how to make a YouTube channel is just step one. Mastering YouTube takes time.
By sticking to the tips outlined in this guide, your channel will be up and running in no time.
Once you create a YouTube channel and have your videos up and running, your next step is to get the word out there. After you build your channel, read our article all about how to promote your YouTube channel to get the word out, and the views up.
YouTube channel FAQs
Is it free to create a YouTube channel?
Yes, creating a YouTube channel is free. All you need is a Google Account.
How can I create a YouTube channel and earn money?
To monetize your YouTube account, you need to be a part of the YouTube Partner Program. Learn more about how to make money on YouTube.
Share