Facebook ads manager
Facebook Ads Manager is an ad management tool to make, edit and analyze paid promotional Facebook campaigns. Facebook recently combined Ads Manager and Power Editor into one platform to make it easier to create and monitor social media ad campaigns across multiple advertising platforms owned by Facebook, including Instagram ads.
How Do I Use Facebook Ads Manager?
There are two ways to use Facebook Ads Manager to make a new campaign: guided creation and quick creation. Switch between the two by clicking the button “Switch to Guided Creation” or “Switch to Quick Creation.”
Features of Facebook Ads Manager include:
- Choose which devices to display ads (desktop, mobile or both)
- Select where on page to include ads (News Feed, Right-Hand Column)
- Upload contact lists for custom targeting
- Locate people similar to your target audiences
- Use A/B testing to see the most effective ad elements and strategies
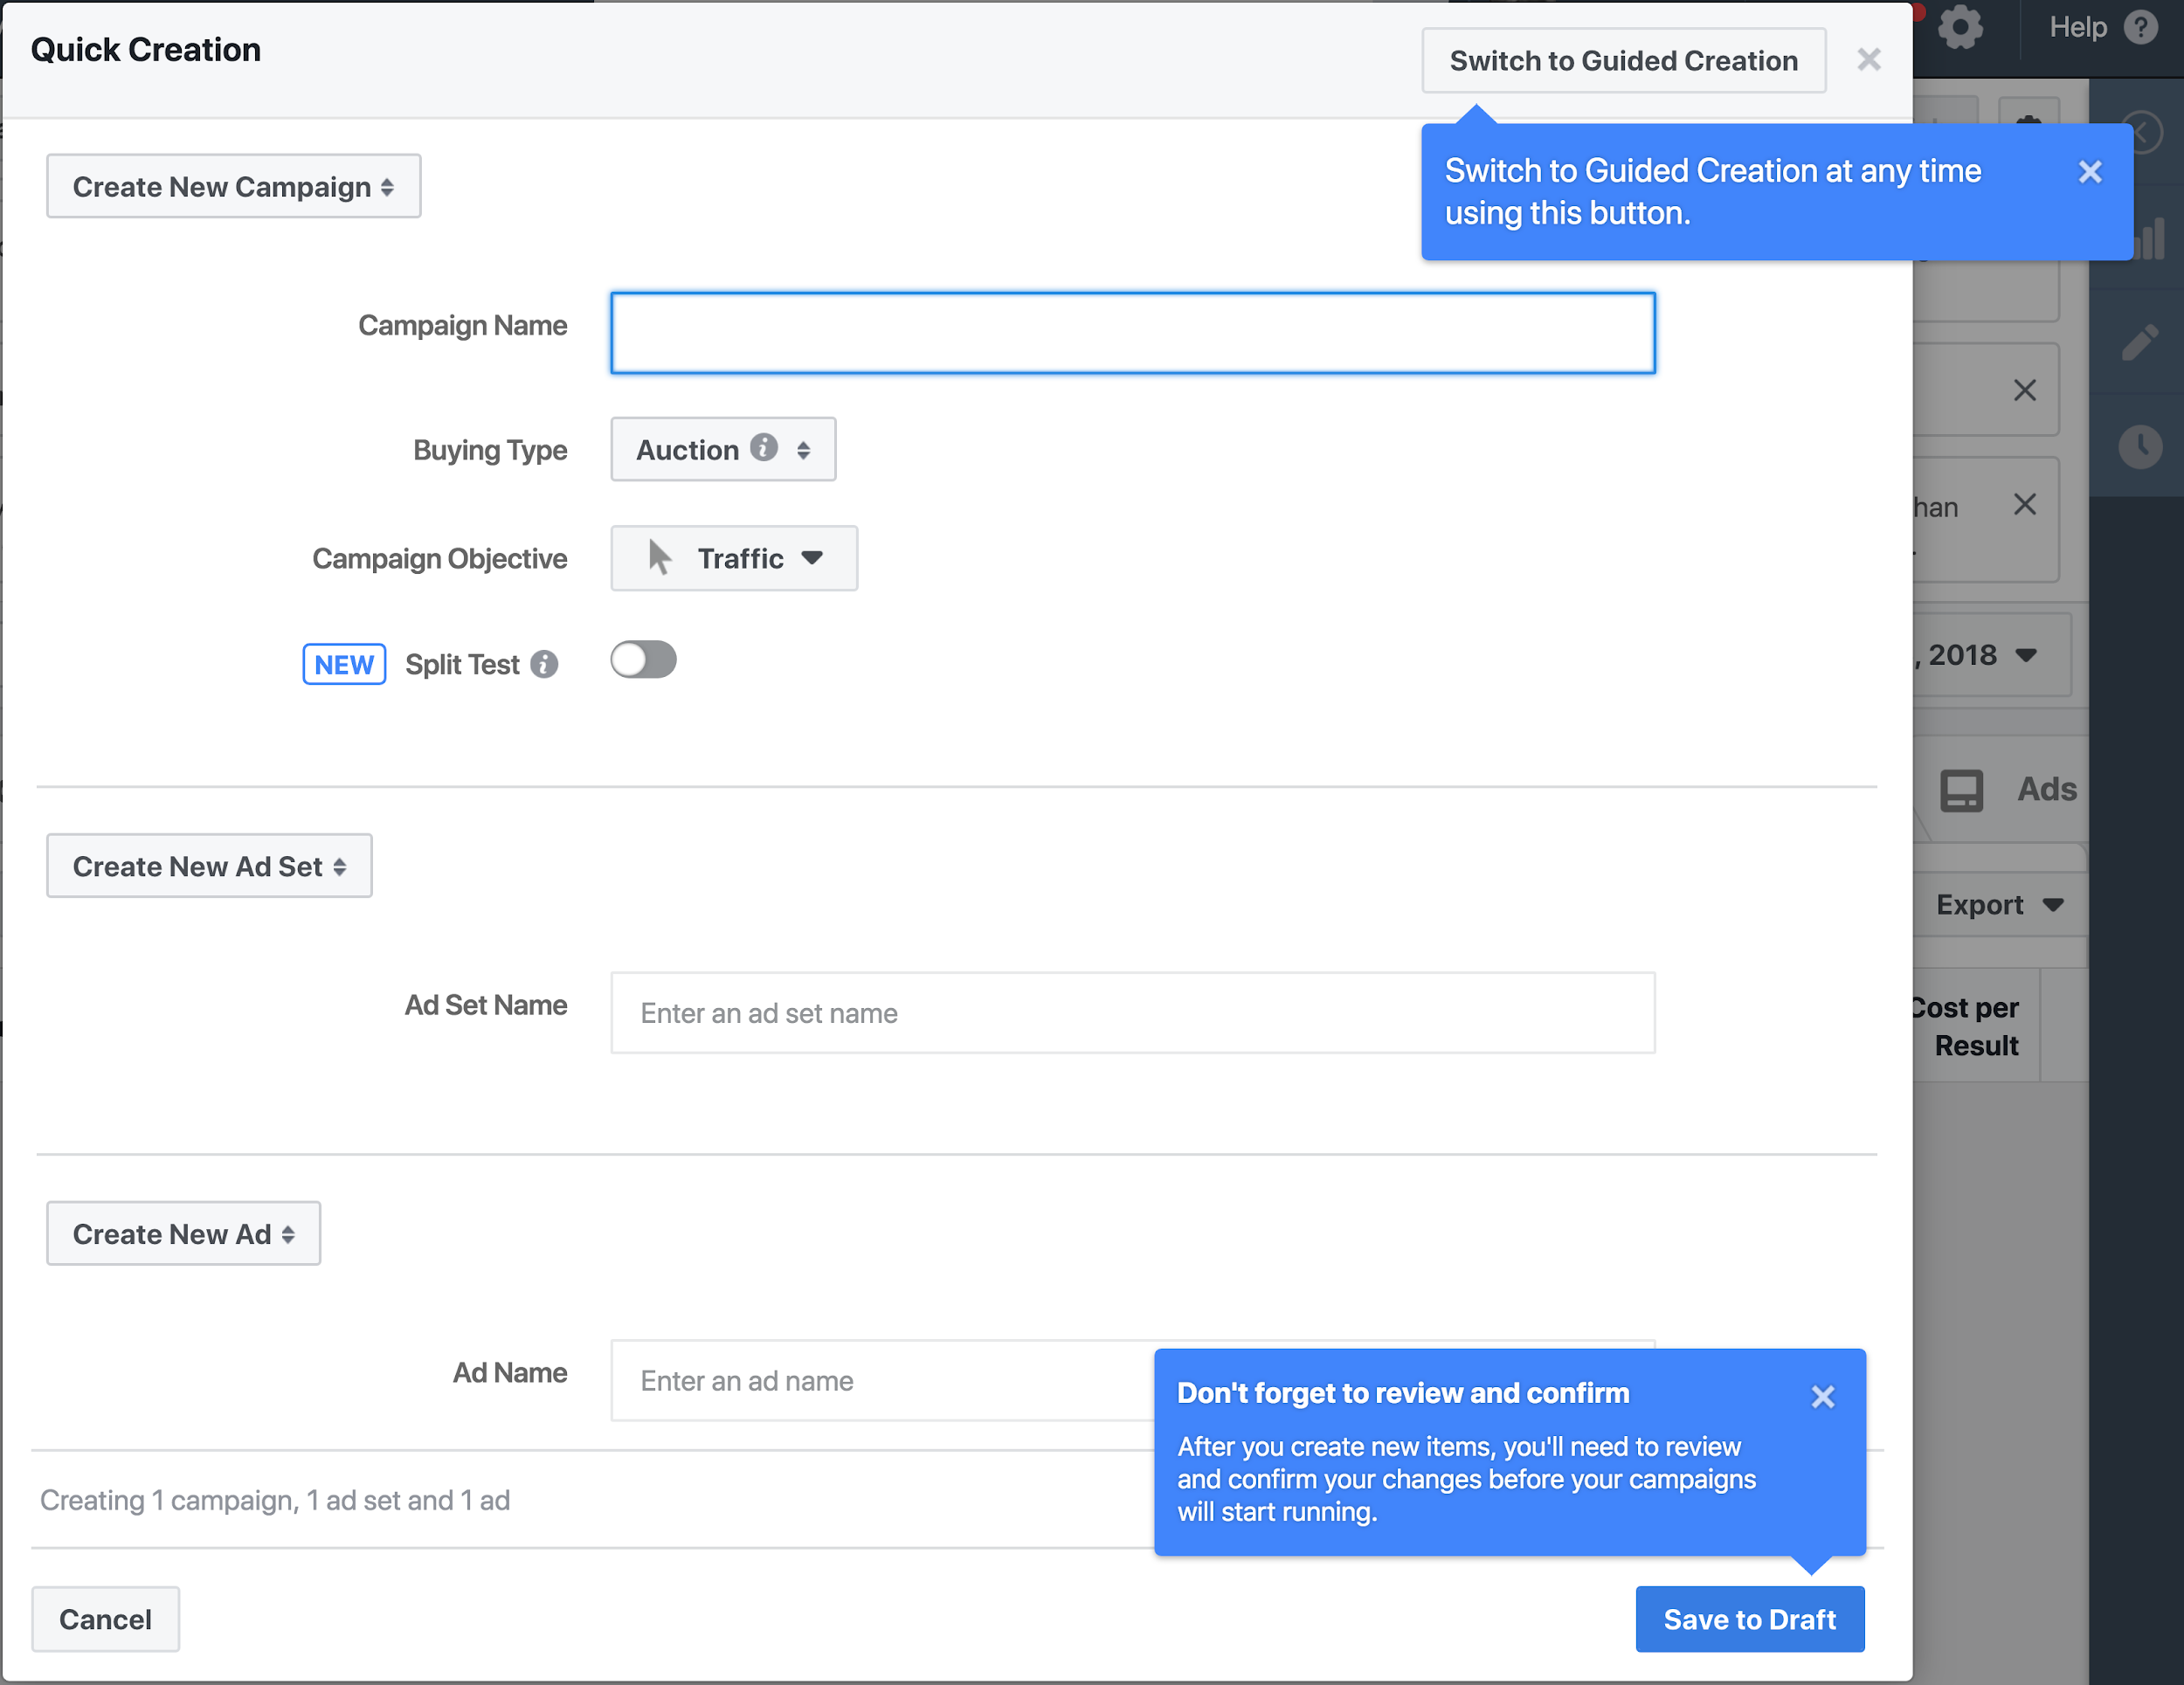
What Is Quick Creation?
Quick creation allows you to choose your Facebook ad settings and names for ads, ad sets and campaigns in one window.
What Is Guided Creation & How to Use It
Guided creation acts as a step-by-step guide for beginners to create entirely new Facebook ad campaigns. Follow these steps:
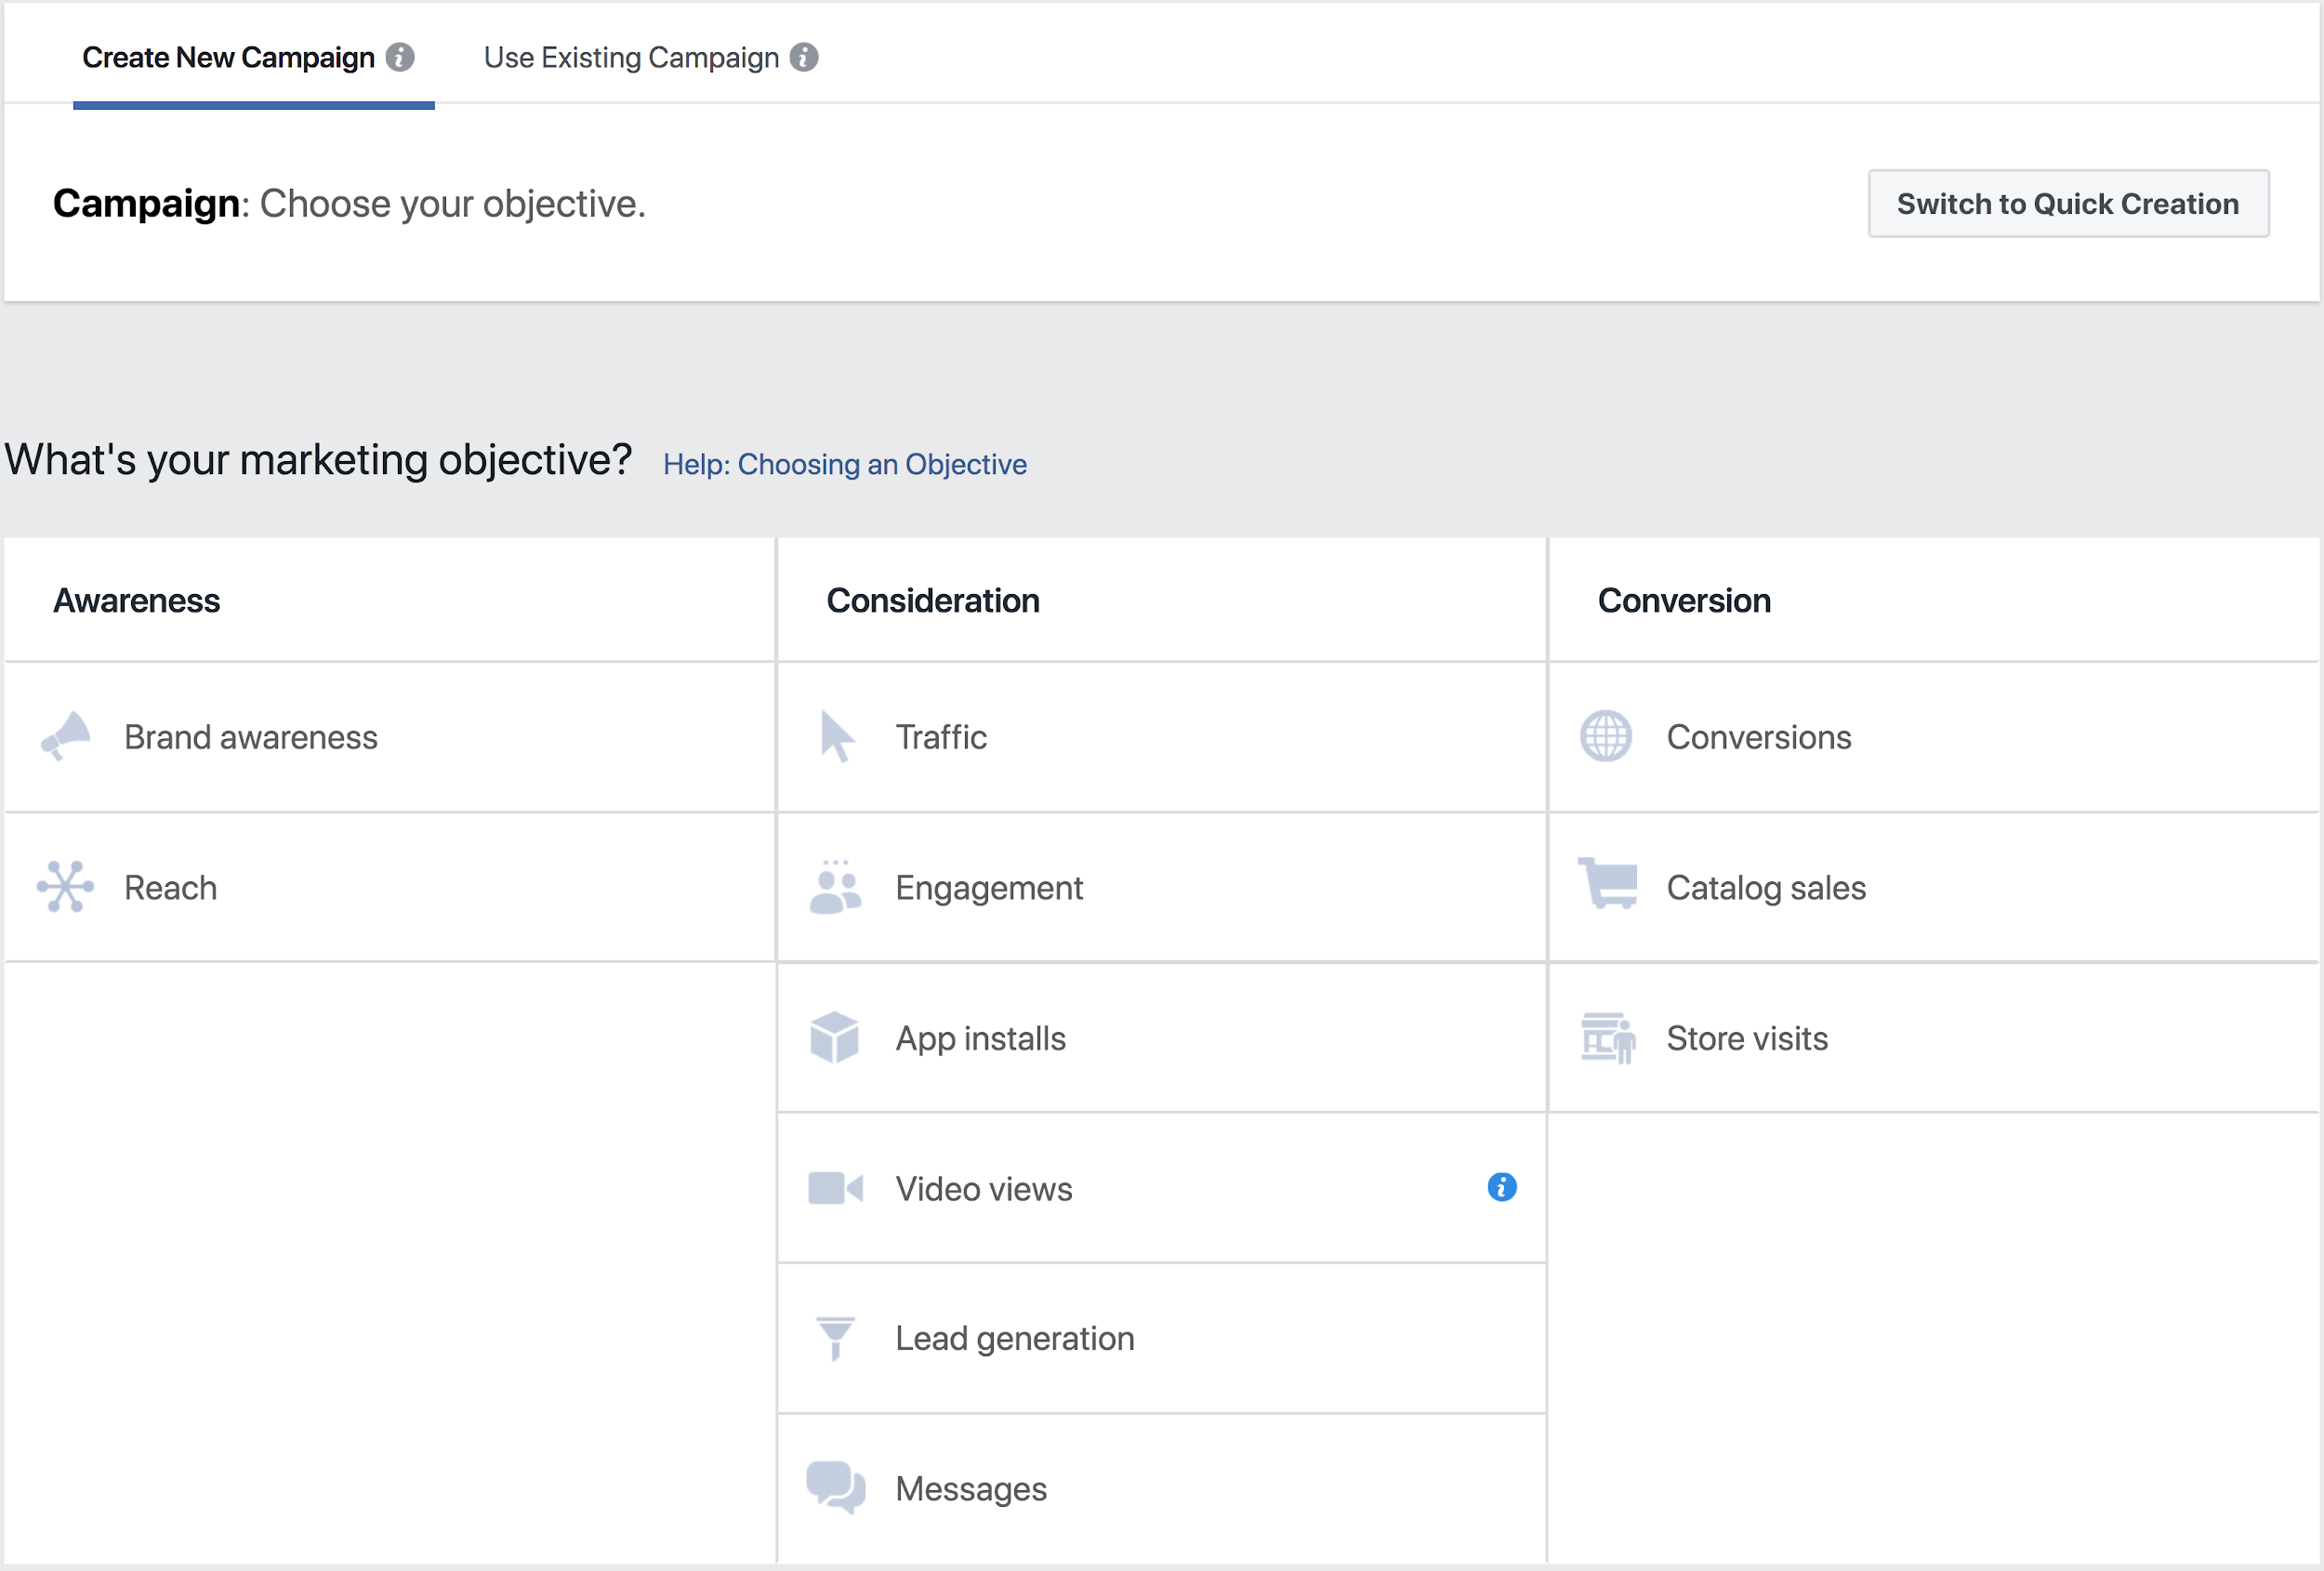
1. Choose the Marketing Objective Based on Your Business/Revenue Goals
For example, if you want to increase the overall number of users who see your ad, choose “Reach” under the “Awareness” heading. Type in the “Campaign Name.” Be as specific as necessary, especially if you have multiple campaigns at the same time.
2. Set Up Your Ad Account
In the next window, set up your ad account by selecting info, including country, currency and time zone. Choose your currency and time zone carefully because you will not be able to change these settings again unless you create a new ad account. Facebook will record data for billing and reporting purposes based on your currency and time zone info. Click Show Advanced Options to name your ad account.
3. Click the Option to Create One Ad Set or Several Ad Sets
Choose between the tabs “Create New Ad Set” or “Create Multiple Ad Sets.” “Ad Sets” let you choose various sets that can differ between audience, locations and more.
4. Select the Facebook Page for the Ad Set From the Drop-Down Menu
If you don’t see the page you want, click the “+” button to create a new page.
5. Determine Details for Your Audience, Including Locations & Demographics
Make a custom audience for improved targeting by creating lists of visitors, leads or customers. Add other audience info, including location, age range, gender and languages. Include detailed targeting to match audience with desired demographic, interest or behaviors. Next to “Connections,” select connection type to reach those who have fulfilled a specific action, such as liking your page, and meet your targeting criteria.
6. Choose Placements of Your Ad
Ad placements include Facebook, Instagram, Audience Network and Messenger. Choose to leave some placements out with the “Edit Placements” option or pick “Automatic Placements” to automatically optimize ad displays.
7. Pick Optimization & Delivery Options
These include whether you’re optimizing “reach” or “impressions,” how often your ad appears, bid strategy and more.
8. Set Your Budget & the Date Ads Start Appearing
Select how much to allocate your ad budget toward your ad sets, your total budget and the starting schedule for sets.
Pros of Facebook Ads Manager
The pros of Facebook Ads Manager include:
- Edit ads or campaigns en mass (calls-to-action, bids, budgets, audiences, etc.)
- Manage campaigns across Facebook, Instagram and Audience Network
- Analyze and replicate top-performing Facebook marketing examples.
- Include variations in audiences, locations and more
- Use the built-in analysis tool called Ads Reporting
- Set your campaigns and ad sets to suit your budget
Resources for you
37 free social media strategy templates that will elevate your workflows
Published on December 5, 2025 Reading time 15 minutes
Recommended for you
Build and grow stronger relationships on social