October 10, 2019
Monitor and manage notifications for approvals and tasks in the Notifications Drawer
The Notifications Drawer centralizes incoming notifications about assigned approvals and task activities to help you easily monitor and take action on your Sprout account activity in real-time. For users with multiple groups, this means you can view and take action on notifications and issues across all of your groups in one centralized location.
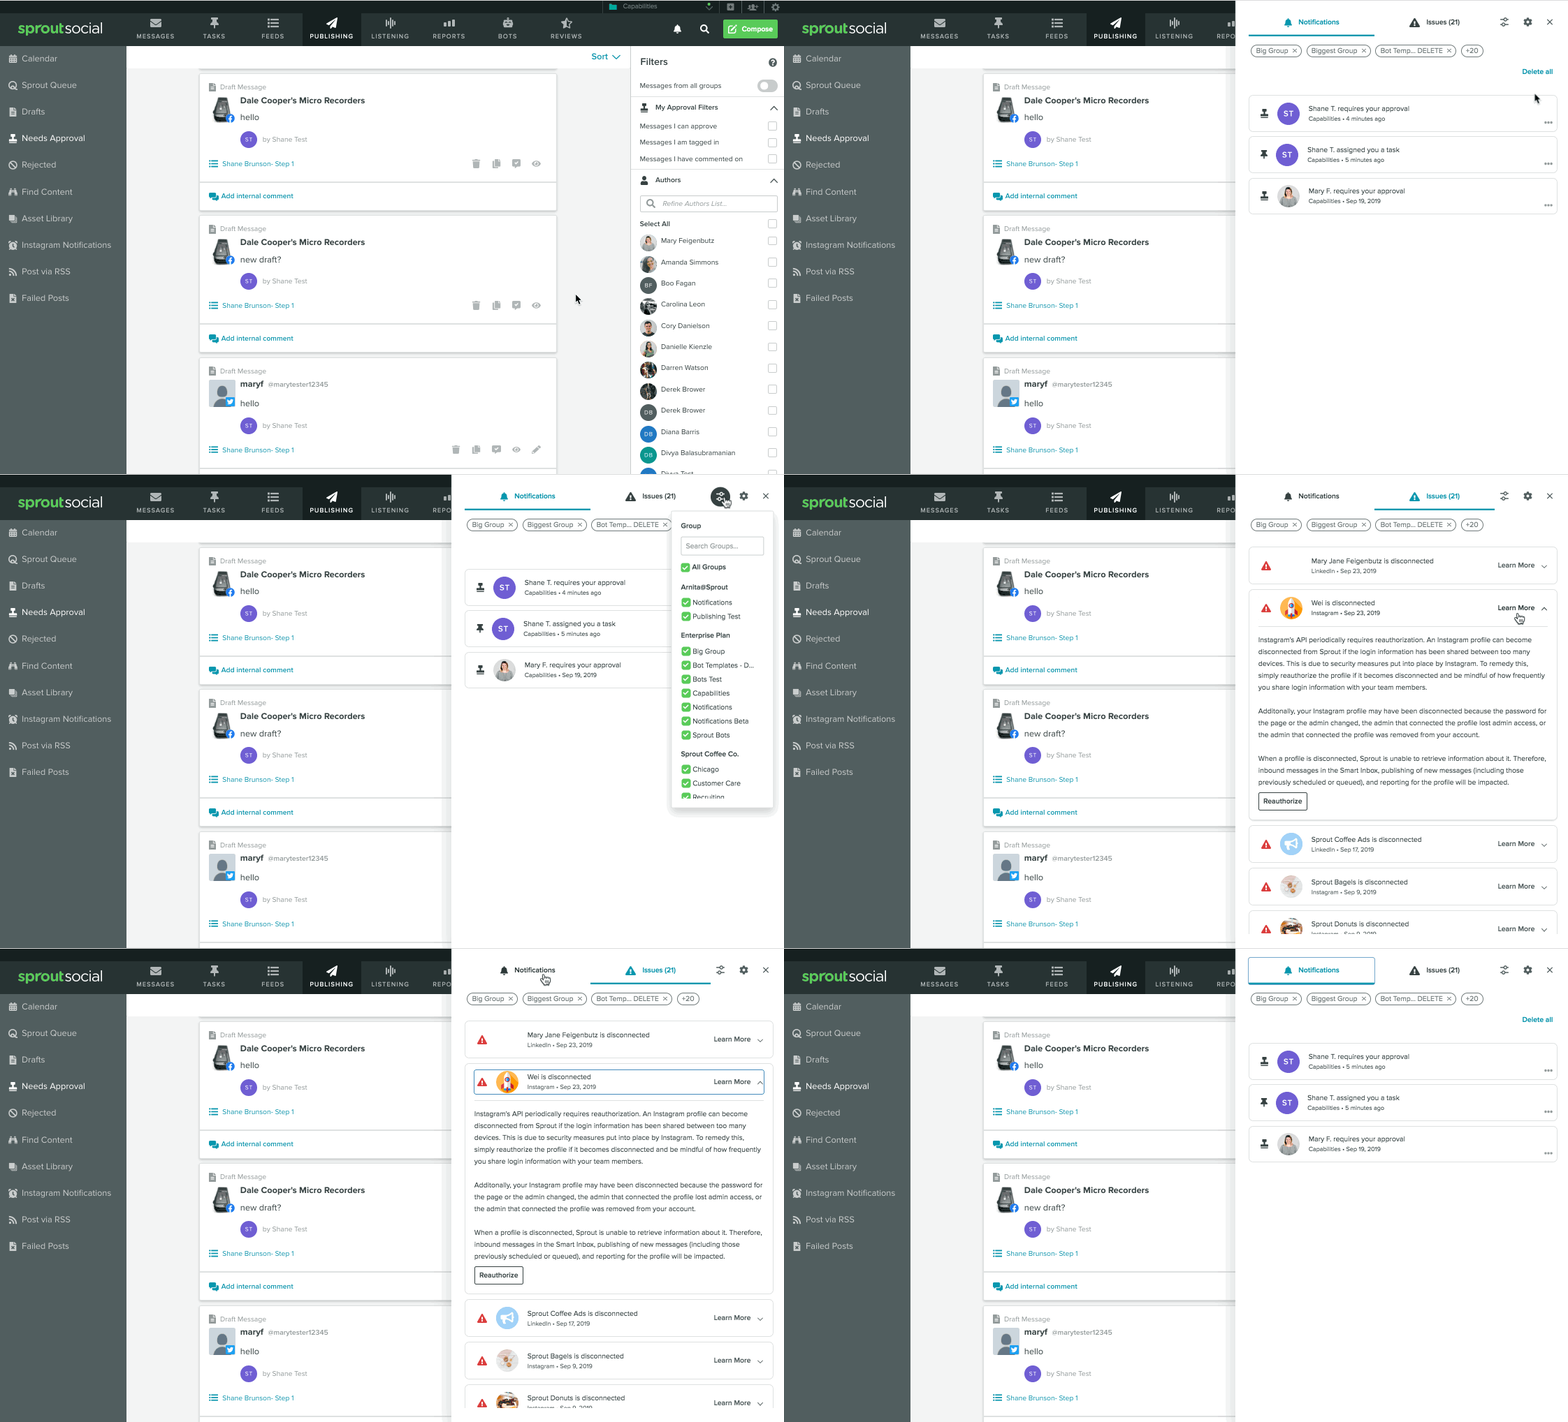
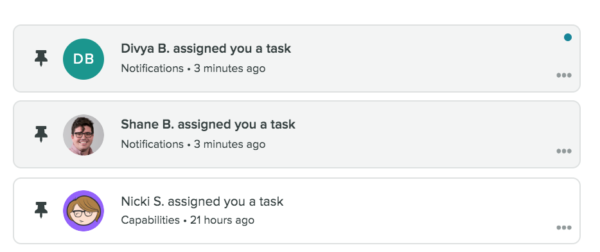
Notifications are organized chronologically and in one of three status states: Unseen, Read, or Unread. Notifications also provide contextual information, including the notification type, the teammate who triggered the notification, the group (if applicable), and timestamp (see screenshot below).
- HOW-TO:
- Click the bell icon in the top right corner of the application to open the drawer.
- Scroll down through the Notifications tab (default view) to see notifications about approval requests and task activities in your Sprout account.
- Click directly into the notification to be taken to a more detailed view in a new browser window.
- Click More Options (…) in the bottom right corner of the notification to delete, mark as read, or disable the notification type.
- Click the “Mark All as Read” text at the top of the drawer to mark all notifications as read.
Monitor and manage profile disconnection issues in the Notifications Drawer
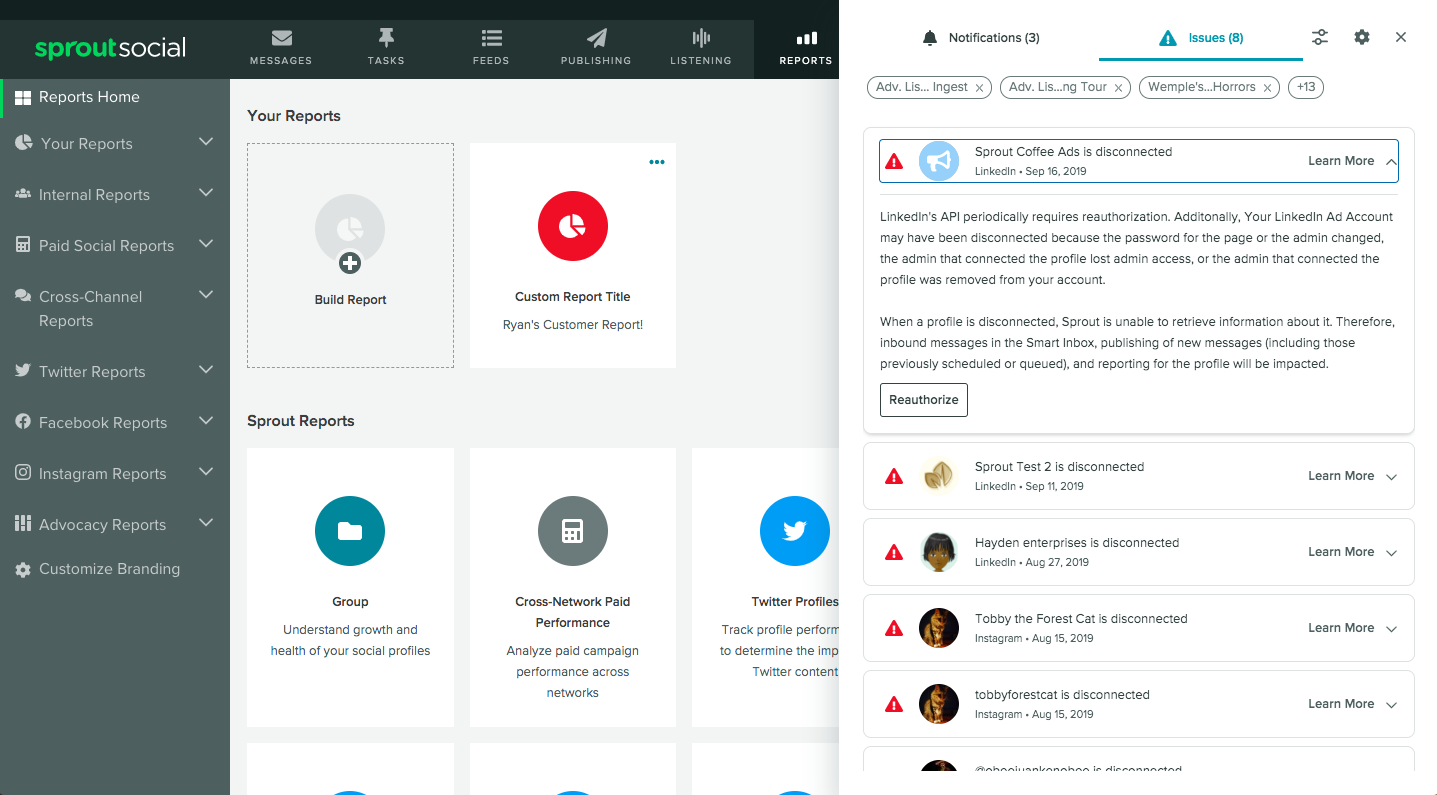
The Notifications Drawer displays notifications about profile disconnection issues. These will come in the form either of a warning that a profile in your account will be disconnected soon, or an alert that a profile has already been disconnected. If you have the correct permission settings, you will be able to reconnect your profiles directly from the drawer.
- HOW-TO:
- Click the bell icon in the top right corner of the application to open the drawer.
- Click to the Issues tab to see updates about profile disconnection issues, organized chronologically.
- Click into the issue to see more information about why your profile is (or will be) disconnected.
- Click the “Reauthorize” button at the bottom left of the issue to reconnect your profile (only if you have the correct permission settings — otherwise, please contact a team member to resolve).
*Note: Issues will clear out of the notifications drawer only when you (or a team member) has successfully reconnected the profile.
Filter notifications by type and groups
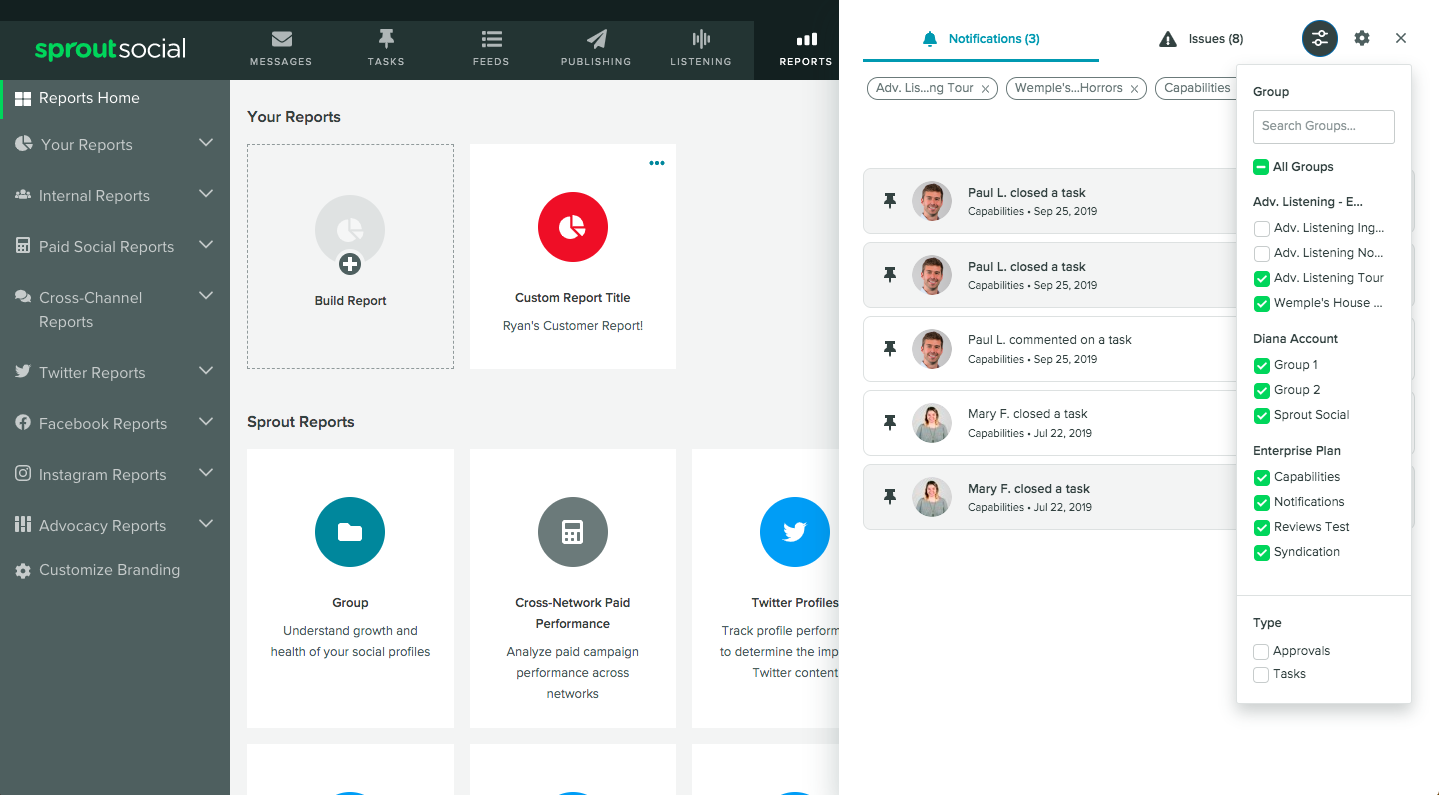
The Filter feature allows you to customize which notifications you want to see in the drawer. You can filter notifications by type (only available for approvals and tasks, not issues). If you have multiple Groups in your Sprout account, you can also use the Filter feature to control which groups you see notifications for in the drawer. Selected Groups will appear in the pill-shaped text bubbles at the top of the drawer’s default view.
- HOW-TO:
- Click the Filter icon in the top right of the drawer to open the filter panel.
- Select/deselect Approvals and Tasks under the Type header.
- Select/deselect Groups manually, or click the All Groups checkbox to select all groups.*
- Search your groups in the search bar at the top of the Filter panel to find your groups more quickly.*
*Only available to users with multiple groups in their Sprout account.
Customize your notification preference settings
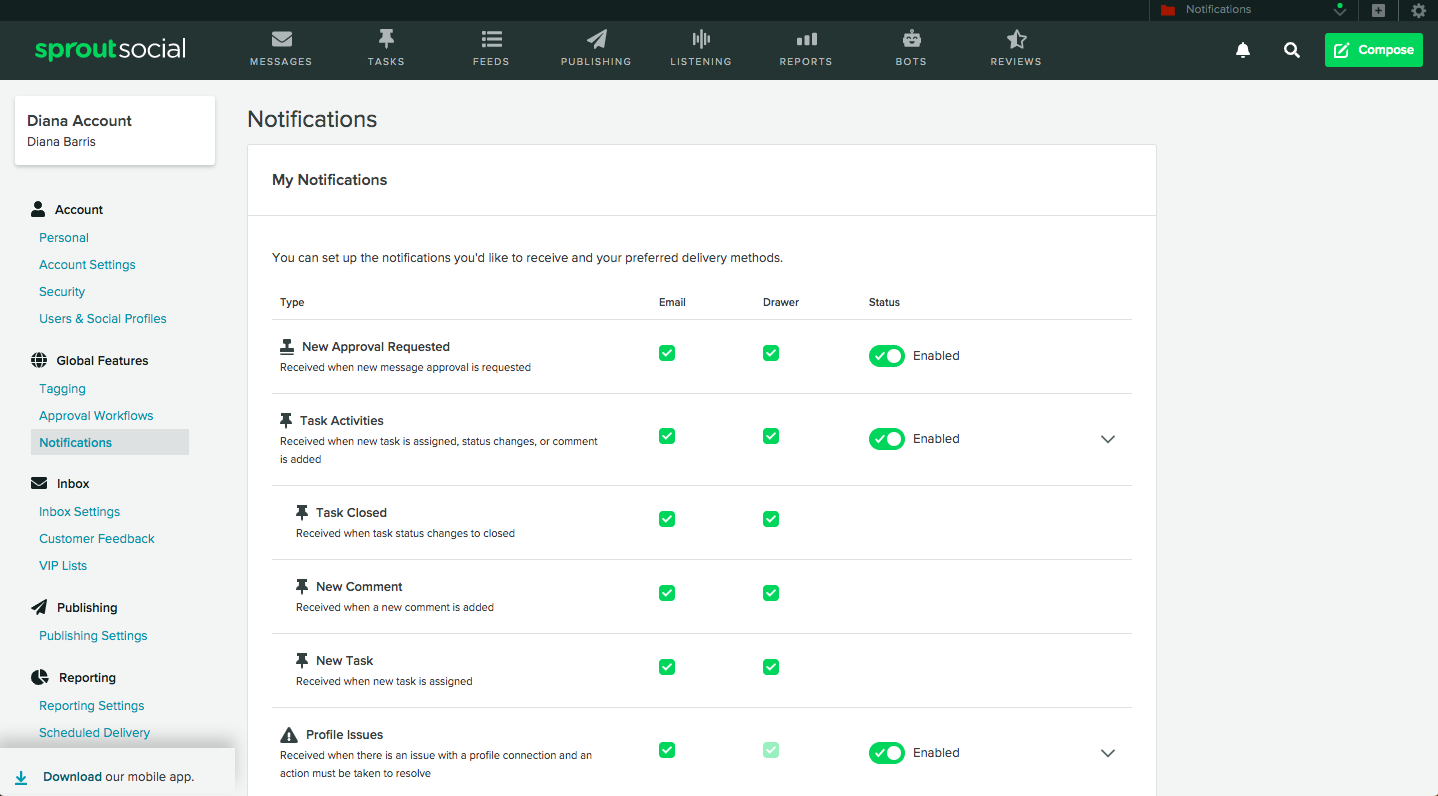
The Notifications Preferences Settings page allows users to customize which notification types they receive as well as their delivery method (email and/or in-app drawer). Every user will have full control of their own notification preferences settings, regardless of their permission settings.
- HOW-TO:
- Click the gear icon at the top right of the drawer to access the settings page.
- From here, you can select and deselect the notifications types you would like to receive, including Approval requests, Task activities, and Profile Issues.
- Select/deselect the checkboxes under Email and Drawer to enable/disable those delivery methods.
*Note – You can also access the page by clicking the gear icon in the top right of the platform and selecting Settings from the drop-down list. Once on the Settings page, go to the left-hand navigation bar and click on Notifications (under the Global Features header).

Share