August 17, 2017
Assign Permissions to Create Facebook Chatbots
Users with Full Publishing permissions can create, edit, activate or delete a chatbot for a given Facebook Page.
- HOW TO:
- When adding a new user, click + invite new team members and set their permissions.
- To update an existing user’s permissions, go to Settings > Users and Profiles and update an individual user’s permissions.
Note: Users with Read Only, Needs Approval or Can Reply permissions to a Facebook Page can view an existing chatbot but they cannot create new chatbots or take action (i.e. edit, activate or delete).
Add a New Facebook Chatbot and Assign to a Page
Sprout’s Bot Builder makes it easy for users to add a new chatbot to an existing Facebook Page. A name and a brief description can also be included to describe the bot internally.
- HOW TO:
- Select Bots from the Settings menu.
- Click Add a Chatbot.
- Enter a name for your bot (internal only).
- Enter a brief description for your bot (optional).
- Assign your bot to a specific Facebook Page by choosing from the list.
- Click Next.
Note: Some users may need to accept additional permissions on Facebook to configure a chatbot.
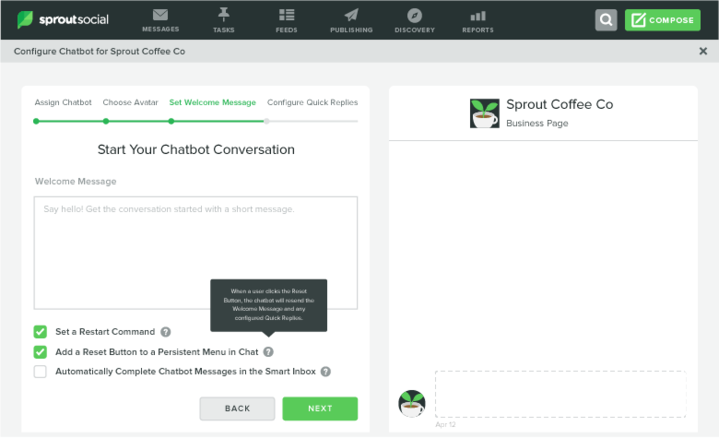
Initiate your Facebook Chatbot Conversation
Sprout’s wizard enables users to create a chatbot conversation based on a simple set of rules. Set a Welcome Message to proactively greet users and set expectations once they’ve clicked the Get Started Button and entered the Messenger conversation. Include a Restart Command and/or a Restart Button to enable those that engage with your chatbot to restart the conversation by sending a keyword or clicking a button, respectively.
- HOW TO:
- Enter a Welcome Message in the text box.
- Check Set A Restart Command.
- Enter a Keyword Trigger such as “Refresh”.
- Check Add a Restart Button in the Persistent Menu Chat.
- Enter a button label such as “Start Over”.
- Check Automatically Complete Chatbot Messages in the Smart Inbox.
- Click Next.
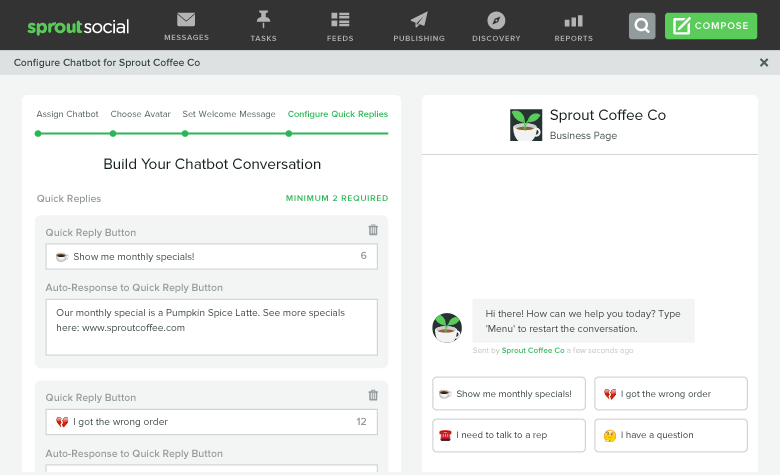
Add Quick Replies and Auto-Responses to Facebook Chatbots
Prompt customers with the best ways to reply to a Welcome Message using Quick Replies, a list of preset reply options. Auto-responses appear in response to each Quick Reply and are an opportunity to respond to a customer’s question and let them know how you will follow up. To give users sufficient options, include at least two Quick Replies and up to six total.
- HOW TO:
- Click Add Quick Reply.
- Add an Auto-Response to your Quick Reply.
- Click Finish to save and return to the Bots home screen.
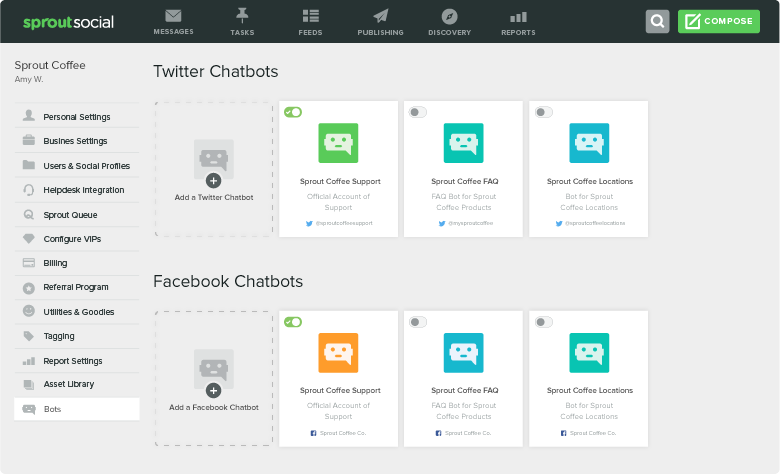
Activate and Manage Facebook Chatbot Settings
Sprout users can activate, edit, duplicate, delete or view chatbots from the menu on the Bots home screen. This central settings location enables users to easily manage Facebook chatbot conversations and settings from one place.
- HOW TO:
- From the desired chatbot, click the toggle to Activate and Deactivate existing chatbots.
- Click (…) to open the menu.
- To change chatbot settings or copy, select Edit.
- To copy the chatbot, select Duplicate.
- To remove the chatbot, select Delete.
- To view the live chatbot on Facebook Messenger, select View. Note: your chatbot must be activated to see it live.
Manage Chats from the Smart Inbox
View and manage all incoming Facebook chatbot messages (including Quick Replies and Restart Commands) from the Smart Inbox. Quickly reply, task, mark as complete or tag each message.
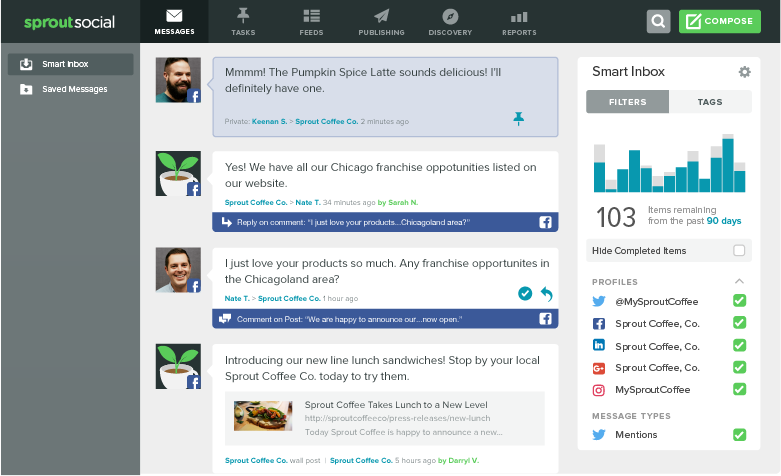
Auto-Complete Chatbot Conversations from the Smart Inbox
Sprout’s Bot Builder allows users to auto-complete all Quick Reply and Restart Command messages coming into the Smart Inbox from a specific chatbot. Users can maintain a clean inbox and focus only on messages that require action.
- HOW-TO:
- Select Bots from the Settings menu.
- Click (…) to open the menu to Edit your chatbot.
- In the Welcome Message screen, check Auto-complete chatbot messages in the Smart Inbox.
- Click Next.
Share